> For the complete documentation index, see [llms.txt](https://docs.snyk.io/llms.txt). Markdown versions of documentation pages are available by appending `.md` to page URLs; this page is available as [Markdown](https://docs.snyk.io/developer-tools/snyk-cli/scan-and-maintain-projects-using-the-cli/snyk-cli-for-open-source/integrate-snyk-into-your-workflow-using-the-cli.md).
# Integrate Snyk into your workflow using the CLI
How to integrate Snyk Open Source into your workflow using the CLI
{% hint style="info" %}
**Snyk is rolling out a new navigation.** The steps on this page describe the classic interface. If your view looks different, visit [Navigate the Snyk Web UI](https://docs.snyk.io/navigate-the-snyk-web-ui#where-things-moved) to map these options to the new interface.
{% endhint %}
## Integrate Snyk into your workflow using the CLI
This page provides an example of integrating Snyk into your GitHub workflow using the [Snyk CLI](/developer-tools/snyk-cli/overview.md).
#### Step 1: Set up the environment
1. Open the [Snyk CLI](/developer-tools/snyk-cli/overview.md), and run a git clone command on the **goof** repository.
```
git clone https://github.com/snyk/goof.git
```
2. Create a new branch, add vulnerabilities on this branch, then merge changes back to GitHub as a Pull Request:
```
git branch add_vulns
git checkout add_vulns
```
#### Step 2: Add an open-source dependency
Review the **package.json** manifest file in your cloned goof application, to see multiple direct dependencies listed:
List of dependencies in the package.json file
{% hint style="info" %}
These direct dependencies can also have additional transitive dependencies; libraries that they depend on.
{% endhint %}
To add the dependency:
* Add the **tinymce 4.1.0** library at the bottom of the dependencies list:
```
{
"name": "goof",
...
}
"dependencies" {
...
"typeorm": "^0.2.24",
"tinymce": "4.1.0"
},
...
```
{% hint style="info" %}
Tip: remember to place a comma after the previous dependency.
{% endhint %}
* Create a [lock file](https://docs.npmjs.com/files/package-lock.json) for the Node application:
```
npm install --package-lock
```
{% hint style="info" %}
Tip: if this file already exists, run rm package-lock.json to remove it.
{% endhint %}
#### Step 3: Commit and review changes
* Commit your change locally, checking the status of the change in the local git repository, then adding the change to the local git, and then committing it:
```
git status
git add package*
git commit -m "adding tinymce v4.1.0"
```
* Commit your local code change to GitHub, transferring the files and history to your upstream git repository on GitHub:
```
git push --set-upstream origin add_vulns
```
```
GitHub has received your changes on your **add\_vulns** branch.
```
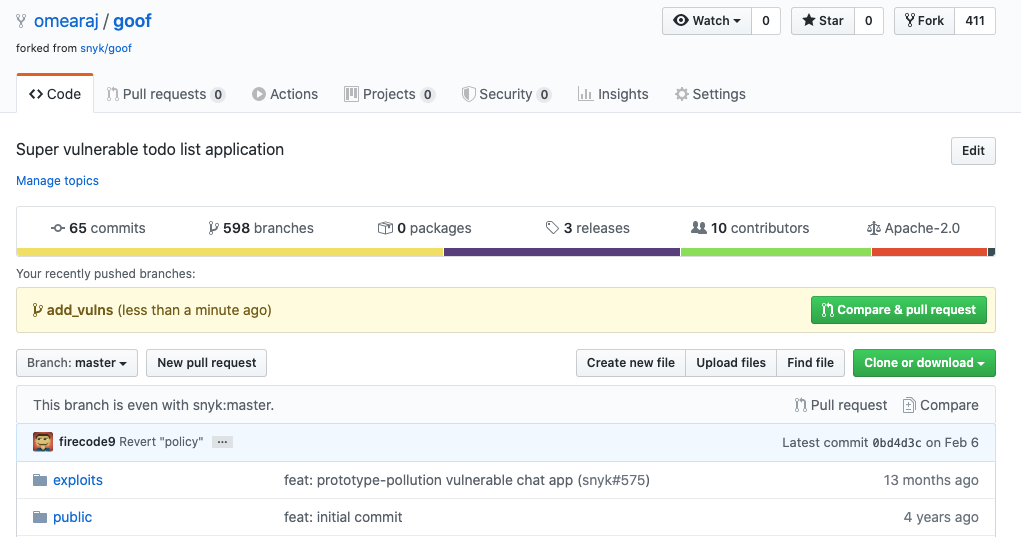
* In GitHub, click **Compare & pull request** to compare the **add\_vulns** branch with the **master** branch and generate a pull request:
Pull request information in GItHub
#### Step 4: Use Snyk PR Checks
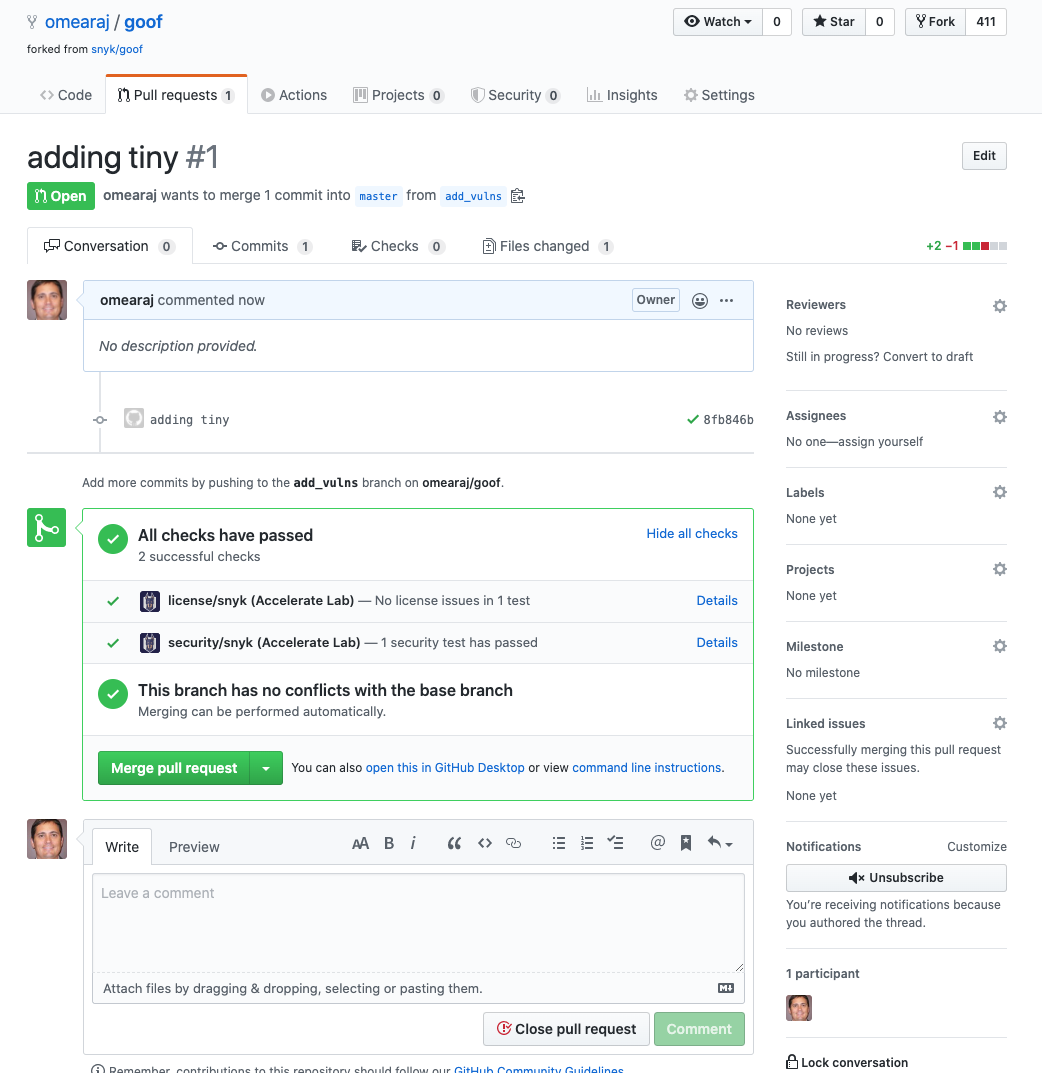
Snyk can auto-scan your pull request (PR) for vulnerabilities and license issues in the merge process:
Snyk pull request checks in GitHub
As the PR workflow is completed, Snyk validates the vulnerability and license policy set for the Project. Based on the policy, the checks either passed or failed; this is shown in GitHub.
This allows you to establish a security gate and prevent pull requests from adding new vulnerabilities, or new open-source libraries that do not meet your license policy, to the source code baseline.
---
# Agent Instructions
This documentation is published with GitBook. GitBook is the documentation platform designed so that both humans and AI agents can read, navigate, and reason over technical content effectively. Learn more at gitbook.com.
## Querying This Documentation
If you need additional information that is not directly available in this page, you can query the documentation by asking a question.
Perform an HTTP GET request on the following URL with the `ask` and `goal` query parameters:
```
GET https://docs.snyk.io/developer-tools/snyk-cli/scan-and-maintain-projects-using-the-cli/snyk-cli-for-open-source/integrate-snyk-into-your-workflow-using-the-cli.md?ask=&goal=
```
`ask` is the immediate question: it should be specific, self-contained, and written in natural language.
`goal` is what the user is ultimately trying to achieve, the reason they need the answer. Sharing it helps GitBook give you a better, more relevant answer. A goal is most helpful when it describes the outcome the user wants rather than restating the question. For example, with `ask=how do I create an API token`, a goal like `automate deployments from our CI pipeline` lets GitBook tailor the answer to that use case.
The response will contain a direct answer to the question and relevant excerpts and sources from the documentation.
Use this mechanism when the answer is not explicitly present in the current page, you need clarification or additional context, or you want to retrieve related documentation sections.
.png?alt=media)