# Getting started with the CLI
## Introduction to Snyk and the Snyk CLI
[Snyk](https://snyk.io/) is a developer-first, cloud-native security tool to scan and monitor your software development projects for security vulnerabilities. Snyk scans multiple content types for security issues:
* [**Snyk Open Source**](https://snyk.io/product/open-source-security-management/): Find and automatically fix open-source vulnerabilities
* [**Snyk Code**](https://snyk.io/product/snyk-code/): Find and fix vulnerabilities in your application code in real time
* [**Snyk Container**](https://snyk.io/product/container-vulnerability-management/): Find and fix vulnerabilities in container images and Kubernetes applications
* [**Snyk Infrastructure as Code**](https://snyk.io/product/infrastructure-as-code-security/): Find and fix insecure configurations in Terraform and Kubernetes code
[Learn more about what Snyk can do and sign up for a free account](https://snyk.io/).
The **Snyk CLI brings the functionality of Snyk into your development workflow**. You can run the CLI locally or in your CI/CD pipeline. The following shows an example of Snyk CLI test command output.
Snyk CLI test command output
Snyk CLI scanning **supports many languages and tools.** For detailed information, see the [summary of supported environments](https://docs.snyk.io/getting-started/introducing-snyk#how-can-snyk-work-in-my-environment). For details about how Snyk scans each content type, see the following:
* [Snyk Open Source scanning](https://docs.snyk.io/scan-application-code/snyk-open-source)
* [Snyk Code scanning](https://docs.snyk.io/scan-application-code/snyk-code)
* [Snyk Container scanning](https://docs.snyk.io/scan-containers), including Docker scanning
* [Snyk Infrastructure as Code](https://docs.snyk.io/scan-cloud-deployment/snyk-infrastructure-as-code) scanning, including Terraform and Kubernetes (K8s) Projects
## Install the Snyk CLI and authenticate your machine
To use the CLI, you must install it and authenticate your machine. See [Install the Snyk CLI](https://docs.snyk.io/~/changes/m2hJeDrttXy2N83AnRjM/snyk-cli/install-the-snyk-cli) and the [Auth](https://docs.snyk.io/~/changes/m2hJeDrttXy2N83AnRjM/snyk-cli/commands/auth) command help. You can refer to the [release notes](https://github.com/snyk/cli/releases) for a summary of changes in each release. Before scanning your code, review the [Code execution warning for Snyk CLI](https://docs.snyk.io/~/changes/m2hJeDrttXy2N83AnRjM/snyk-cli/code-execution-warning-for-snyk-cli).
**Note:** Before you can use the CLI for Open Source scanning, you must install your package manager. The needed third-party tools, such as Gradle or Maven, must be in the PATH.
You can use the CLI in your IDE or CI/CD environment. For details, see [Install as part of a Snyk integration](https://docs.snyk.io/snyk-cli/install-the-snyk-cli#install-as-a-part-of-a-snyk-integration).
You can authorize Snyk CLI in your CI/CD programatically:
* Using a SNYK\_TOKEN envvar (preferred)\
`SNYK_TOKEN= snyk test`
* Or using a Snyk `auth` command\
`snyk auth `\
`snyk test`
## Test your installation
After authenticating, you can **test your installation**. For a quick test, run snyk --help.
Alternatively, you can perform a **quick test** on a public npm package, for example `snyk test ionic`.
Look at the `test` command **report** in your terminal. The report shows the vulnerabilities Snyk found in the package. For each issue found, Snyk reports the severity of the issue, provides a link to a detailed description, reports the path through which the vulnerable module got into your system, and provides guidance on how to fix the problem.
## Scan your development Project
**Note:** Before using the Snyk CLI to test your Open Source Project for vulnerabilities, with limited exceptions, you must **build your Project**. For details, see [Which projects must be built before testing with CLI?](https://support.snyk.io/hc/en-us/articles/360015552617-Which-projects-must-be-built-before-testing-with-CLI-)
In addition, depending on the language of your open-source Project, you may need to **set up your language environment** before using the Snyk CLI. For details, refer to [Open Source language and package manager support](https://docs.snyk.io/~/changes/m2hJeDrttXy2N83AnRjM/scan-application-code/snyk-open-source/snyk-open-source-supported-languages-and-package-managers).
Once you have installed the CLI and authenticated your machine, in order to **scan an open-source Project**, use `cd /my/project/` to change the current directory to`a`folder containing a supported package manifest file, such as `package.json`, `pom.xml`, or `composer.lock`. Then run `snyk test`. All vulnerabilities identified are listed, including their path and fix guidance.
To scan your source code run `snyk code test`.
You can **scan a Docker image** by its tag using [Snyk Container](https://snyk.io/product/container-vulnerability-management/) by running, for example: `snyk container test ubuntu:18.04`.
To scan a **Kubernetes (K8s) file** run the following:\
`snyk iac test /path/to/kubernetes_file.yaml`.
For details about how Snyk scans each content type, see the following:
* [Snyk Open Source scanning](https://docs.snyk.io/scan-application-code/snyk-open-source)
* [Snyk Code scanning](https://docs.snyk.io/scan-application-code/snyk-code)
* [Snyk Container scanning](https://docs.snyk.io/scan-containers), including Docker scanning
* [Snyk Infrastructure as Code](https://docs.snyk.io/scan-cloud-deployment/snyk-infrastructure-as-code) scanning, including Terraform and Kubernetes (K8s) Projects
## Monitor your open-source or container Project
Snyk can monitor your Project periodically and alert you to new vulnerabilities. To set up your Project to be monitored, run `snyk monitor` or `snyk container monitor`.
This creates a snapshot of your current dependencies so Snyk can regularly scan your code. Snyk can then alert you about newly disclosed vulnerabilities as they are introduced or when a previously unavailable patch or upgrade path is created. The following code shows an example of the output of the `snyk monitor` command.
```
> snyk monitor
Monitoring /project (project-name)...
Explore this snapshot at
https://app.snyk.io/org/my-org/project/29361c2c-9005-4692
-8df4-88f1c040fa7c/history/e1c994b3-de5d-482b-9281-eab4236c851e
Notifications about newly disclosed issues related to these
dependencies will be emailed to you.
```
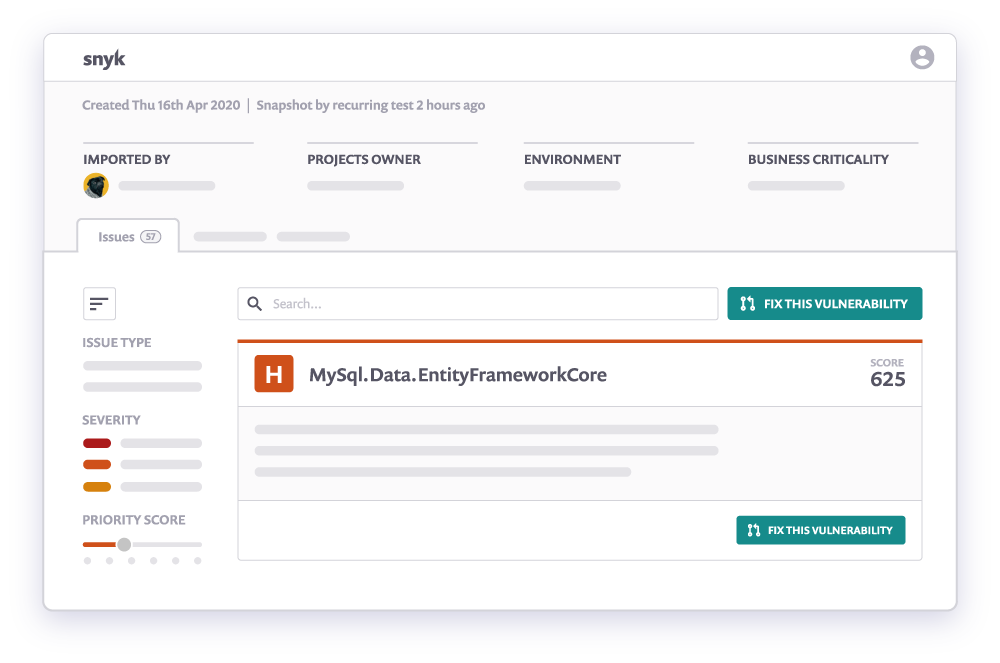
You can log in to the Snyk Web UI and navigate to the [Projects page](https://app.snyk.io/projects) to see the latest snapshot and scan results:
Snyk monitor snapshot and scan results
For more information, see [Monitor your projects at regular intervals](https://docs.snyk.io/~/changes/m2hJeDrttXy2N83AnRjM/snyk-cli/test-for-vulnerabilities/monitor-your-projects-at-regular-intervals).
## Running out of tests
If you run out of tests on an open-source Project, follow these steps:
* Run `snyk monitor`.
* Open the Snyk UI and go to the **settings** of the Project.
* Enter the URL of your open-source repository in **Git remote URI**.
## Additional information about the Snyk CLI
Run `snyk help` or see the [CLI commands and options summary](https://docs.snyk.io/~/changes/m2hJeDrttXy2N83AnRjM/snyk-cli/cli-reference).
See the course [Introduction to the Snyk CLI](https://training.snyk.io/courses/intro-cli) for a quick video training session.
Snyk also provides a [cheat sheet](https://snyk.io/wp-content/uploads/cheat-sheet-snyk-cli-v3.pdf) ([blog post](https://snyk.io/blog/snyk-cli-cheat-sheet/)) and a [video tutorial](https://www.youtube.com/watch?v=xp_LtchEkT8).
In particular, see the information about the following options that you may find useful:
* `--severity-threshold=low|medium|high|critical`: Report only vulnerabilities of the specified level or higher
* `--json`: Print results in JSON format
* `--all-projects`: Auto-detect all projects in the working directory
For detailed information about the CLI, see the CLI docs. For information about scanning for each content type, see the following pages:
* [Use Snyk Open Source from the CLI](https://docs.snyk.io/scan-application-code/snyk-open-source/use-snyk-open-source-from-the-cli)
* [Using Snyk Code via the CLI](https://docs.snyk.io/scan-application-code/snyk-code/cli-for-snyk-code)
* [Snyk CLI for container security](https://docs.snyk.io/scan-containers/snyk-cli-for-container-security)
* [Snyk CLI for Infrastructure as Code](https://docs.snyk.io/scan-cloud-deployment/snyk-infrastructure-as-code/snyk-cli-for-infrastructure-as-code)
## Getting support for the Snyk CLI
[Submit a ticket](https://support.snyk.io/hc/en-us/requests/new) to Snyk support whenever you need help with the Snyk CLI or Snyk in general. Note that Snyk support does not actively monitor GitHub Issues on any [Snyk project](https://github.com/snyk).
## Contributing to the Snyk CLI
The Snyk CLI project is open-source, but Snyk does not encourage outside contributors.
You may look into [design decisions for the Snyk CLI](https://github.com/snyk/snyk/blob/master/help/_about-this-project/README.md).
The Snyk CLI repository is a monorepo that also covers other projects and tools, such as [@snyk/protect](https://github.com/snyk/snyk/tree/master/packages/snyk-protect), also available at [npm package for snyk-protect command](https://www.npmjs.com/package/@snyk/protect).
## Security
For any security issues or concerns, see the [SECURITY.md](https://github.com/snyk/snyk/blob/master/SECURITY.md) file in the GitHub repository.